WebAuthn (Web Authentication) is a modern standard that allows users to authenticate securely using biometric devices, security keys, or built-in platform authenticators – completely without passwords. This makes phishing attacks harder and improves the login experience for users.
In this guide, I’ll show you how to configure Keycloak with WebAuthn for passwordless authentication in a test realm.
⚠️ Note: Make sure your device supports WebAuthn/FIDO2 (e.g., a YubiKey, TouchID, iPhone, or Windows Hello).
I strongly recommend setting this up in a test realm instead of directly in a production environment.
Adjust the Authentication Flow
First, we’ll modify the browser authentication flow to support passwordless login.
- In the Keycloak Admin Console, navigate to: Realm → Authentication → browser
- Click Duplicate to create a copy of the default flow.
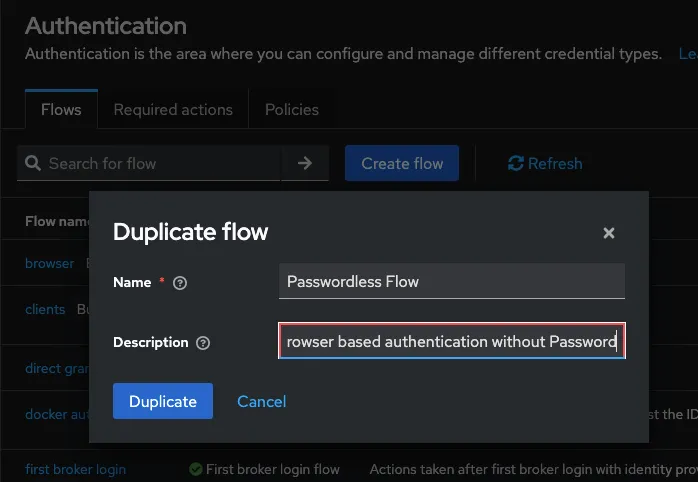
Edit the newly created flow (for example, name it Passwordless Flow – you can choose any name you like):
- Delete the step Passwordless Flow forms.
- Click Add sub-flow, give it a name, and set the Flow type to Generic.
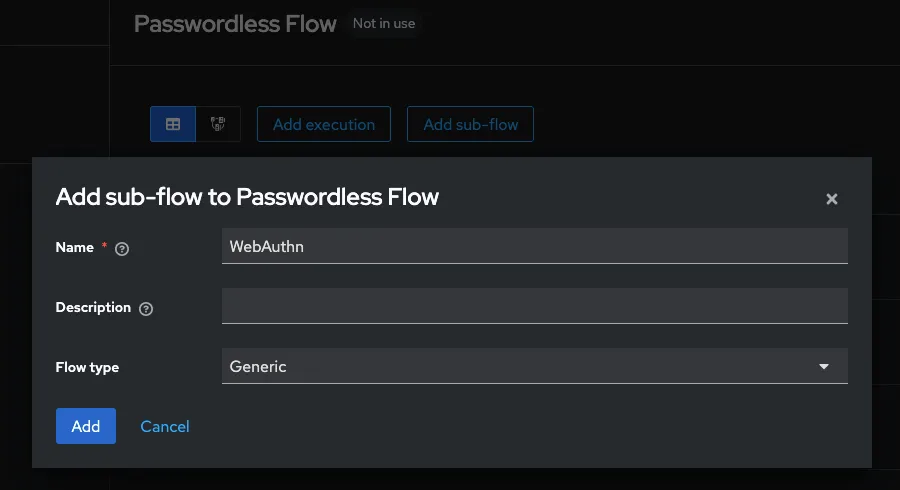
- Set this new sub-flow to Required.
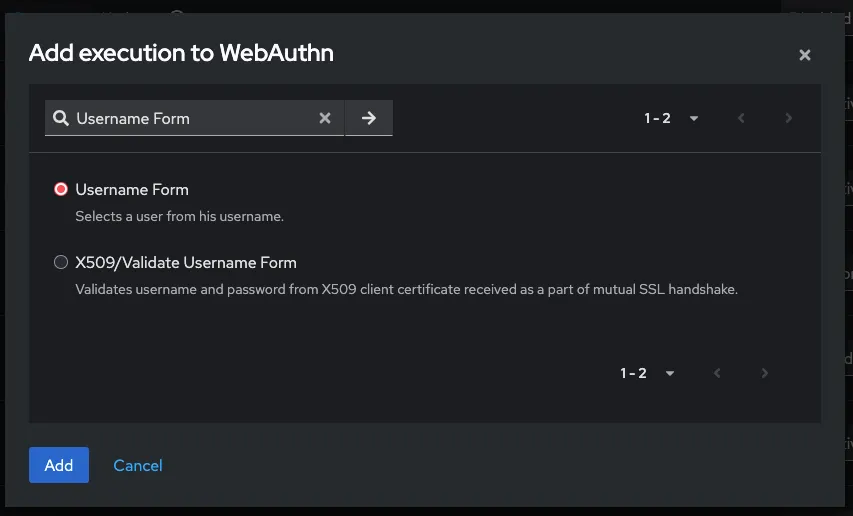
- Click the + icon in the WebAuthn row and select Add execution.
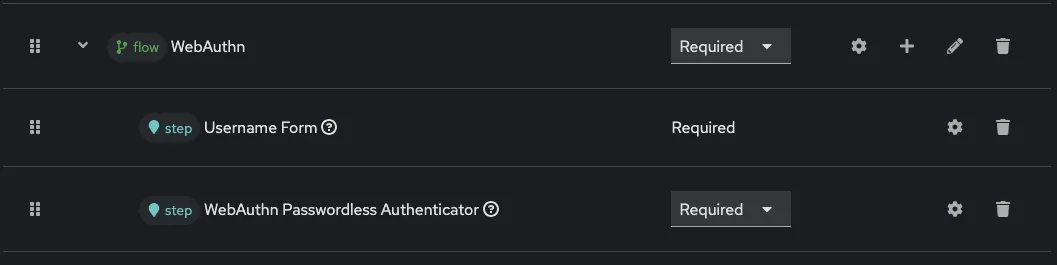
- From the list, choose Username Form.
- Ensure the new sub-flow itself is marked as Required.
- Click the + icon again in the WebAuthn row and select Add execution.
- This time, choose WebAuthn Passwordless Authenticator.
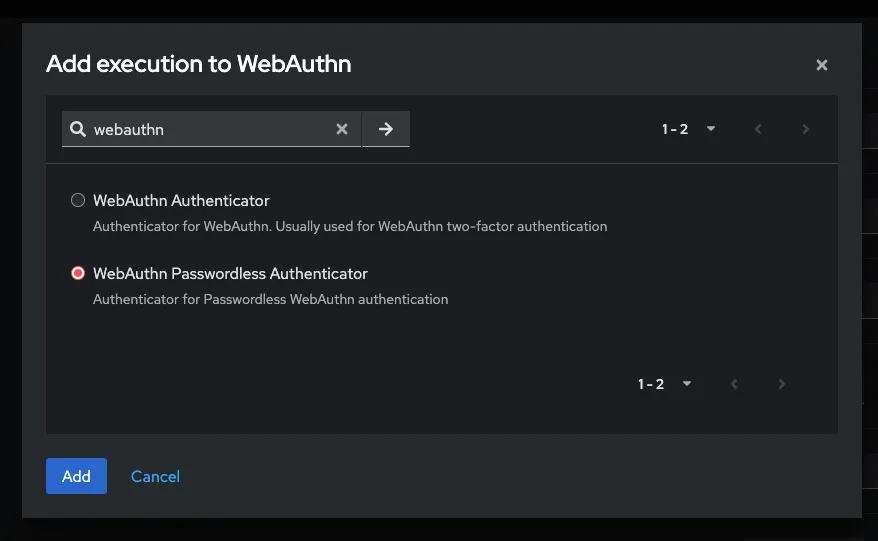
📌 Tip: Make sure that the Username Form step comes before the WebAuthn Passwordless Authenticator step.
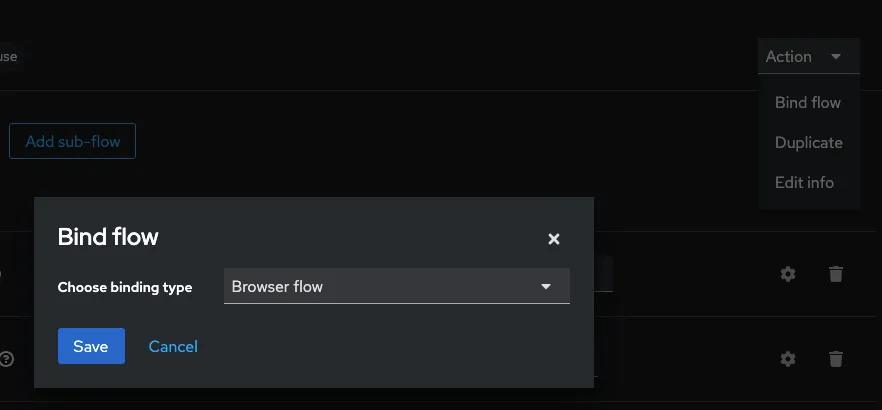
Finally, bind your new flow to the Browser Flow:
Advanced Authentication Configuration
Next, enable the required actions and allow user registration:
- Navigate to: Authentication → Required Actions
- Set both Enabled and Set as default action for WebAuthn Register to ON.

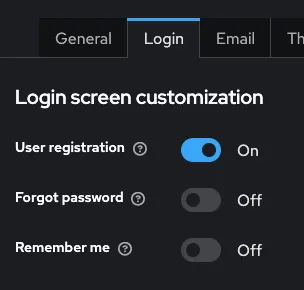
- Go to: Realm settings → Login
- Set User registration to ON.
Create a Client
Now let’s create a client application. In this example, we’ll use the Keycloak demo app, but you can also configure your own client.
Client settings:
- Client ID: no-password-client
- ROOT URL: https://www.keycloak.org/app
- Valid Redirect URIs: https://www.keycloak.org/app/*
- Web Origins: https://www.keycloak.org


Test Your Setup
Time to test the configuration:
- Open https://www.keycloak.org/app.
- Enter your settings (replace placeholders with your own):
- Keycloak URL: Your Keycloak address (e.g., http://localhost:8080)
- Realm: Your realm name
- Client: Your client name
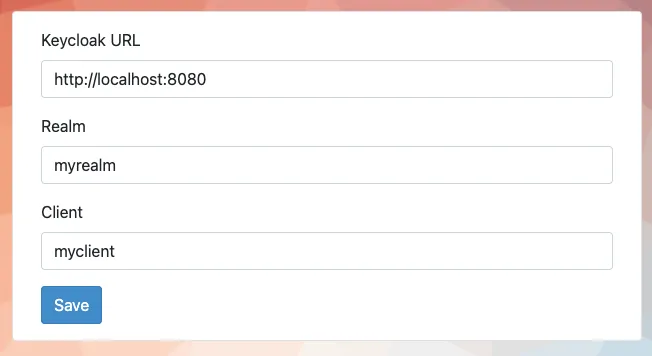
- Save the configuration.
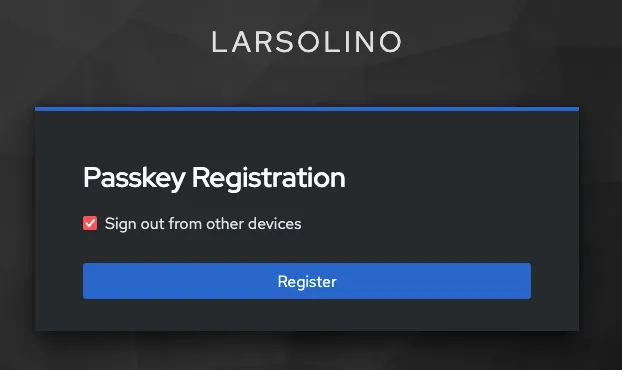
- Click Sign in.
- On the Keycloak login screen:
- Register a new user
- Register a Passkey
- Select a supported device (e.g., YubiKey, TouchID)
- Give the device a label
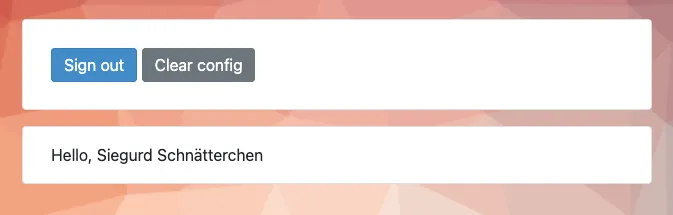
✨ You’re all set! You should now be able to sign in without a password.